How to use reverse applique in mending
Reverse applique is a fun technique that gives you a little special finish.
It can also be used in mending.
Reverse applique is when you add layers of fabric underneath the original fabric, not on top like in applique. Revealing the underlying fabric as a feature.
You might have tried this technique and even not realised it was reverse applique. Having a under patch that is visible.
You can choose to have as many layers of fabric you like, but I do recommend one or two for clothes as it will be very thick and stiff.
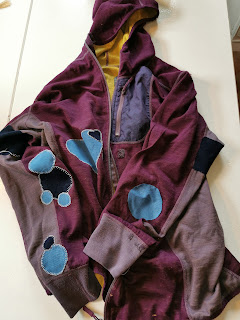
For the singlet I mended, I used one layer.
The shorts have two
Before you start you need to find out what kind of pattern you want to use. And if it will fit your mending project.
Depending on what kind of fabric your garment are made of you might want to add backing to prevent it from fraying.
My singlet is Jersey fabric and so it’s not fraying.
And it’s really easy and fun to work with.
So instead of just fixing the one hole I did make it a upgrade.
Used a triangle that is really to make some sort of macrame with, as a template. Making sure the hole fitted into one of the holes.
Using a water dissolveing fabric marker to draw the pattern.
Using a piece of an t-shirt as a underlayer.
I cut it a bit bigger and trimmed it when I was finishing.
Pinned it in place making sure it covers my pattern on the front.
Then I stitch around the drawed lines.
You can do it by hand or machine.
I hand stitched using embroidery thread on this singlet
When you are finished it’s time to find a sharp scissor and a keep a steady hand. Cutting out the top layer. Close to the edge, but not so close you will cut the seam.
Since I used a bigger underlayer than the pattern, I had to trim it to size.
And then it’s ready to wear.
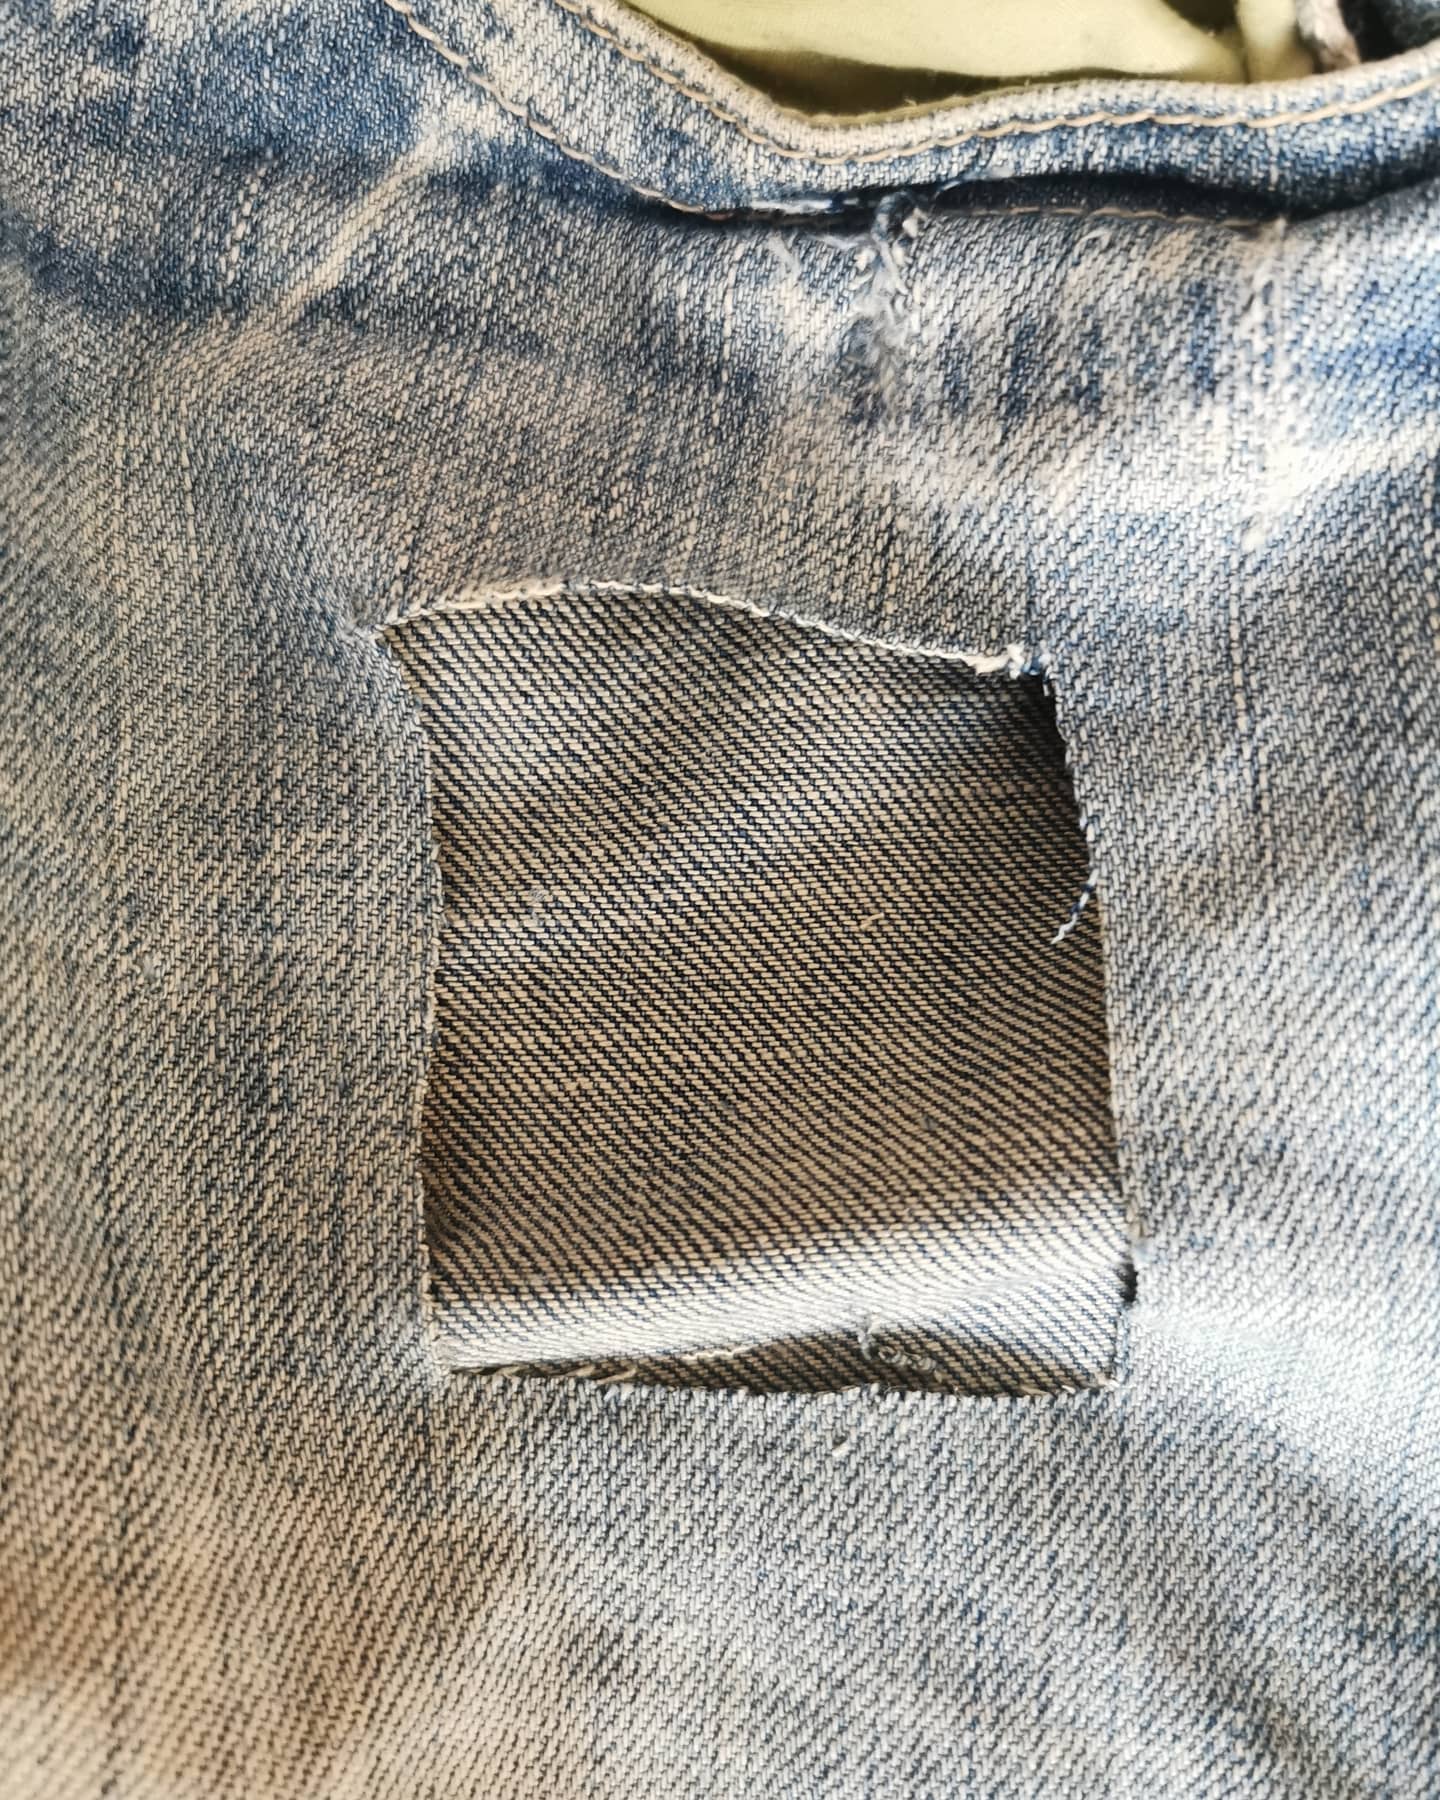
With the denim shorts I started with cutting Making clean edges around the hole.
Using two pieces of fabric for the underlayer. A bit bigger than the hole so it will be room for stitching around.
Using a woven fabric securing edges with iron on backing. You can also use Zigzag stitch or a serger if you like. The vintage lady was a delicate and thin fabric so I chose Iron one backing.
I often see people skipping this step, and I still remember how annoying I thought my mum was when she thought me to sew, nagging about Zigzagging around the edge before sewing. It was so boring, right?
So I learned the hard way it’s even more boring to have put a lot of time and effort into something and it’s ruind because I was lazy and skipped this step. Because if you don’t secure the edges the fabric will fray, and your efforts will have been a waste.
I pinned the two pieces of fabric in place and hand stitched around the edges.
No scary cutting after you have been stitch if you do it this way.